How to Make Sewed Cute and Easy Coasters
Make cool diy coasters using this easy tutorial. Plus a smart workaround to get this patchwork look - no piecing and no quilting involved!

Have you been hit by the spring-cleaning bug yet?
Instead of spring cleaning, I decided for some spring decorating. Don't know if it's wise, but it is so much more fun!
I thought I could add a bit variety to these red and white square coasters from last year, to brighten up the kitchen area. After all, you can never have enough pretty coasters, right?

Diy Coasters - And A Little Hack
And even if I used the same technique to sew them as with a few before, these all look so much different.
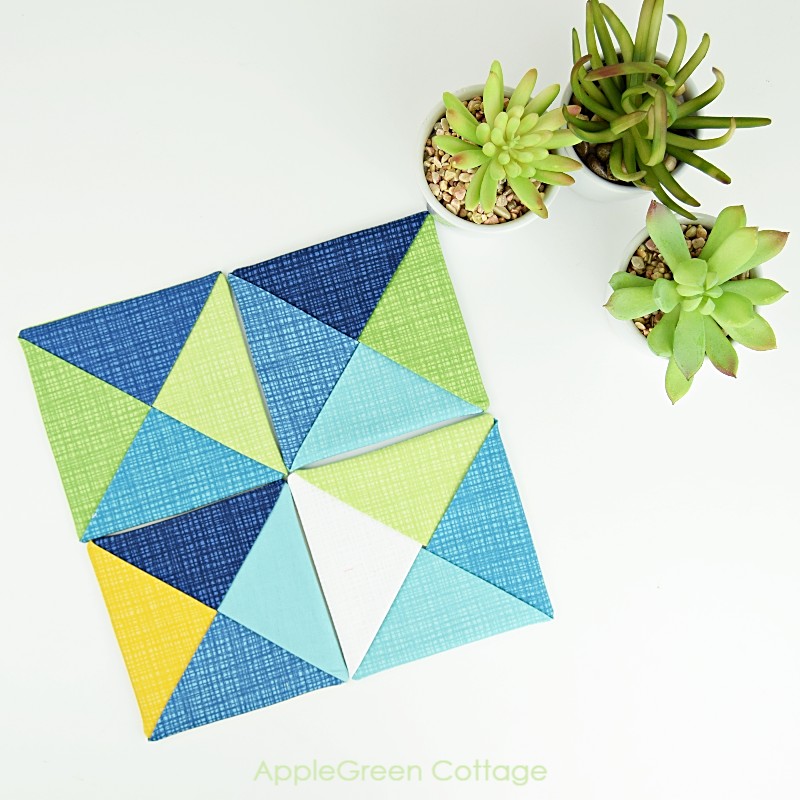
The finished coasters look like quarter-square triangle blocks. Only, there is no quilting. And no piecing triangles together. Easy!

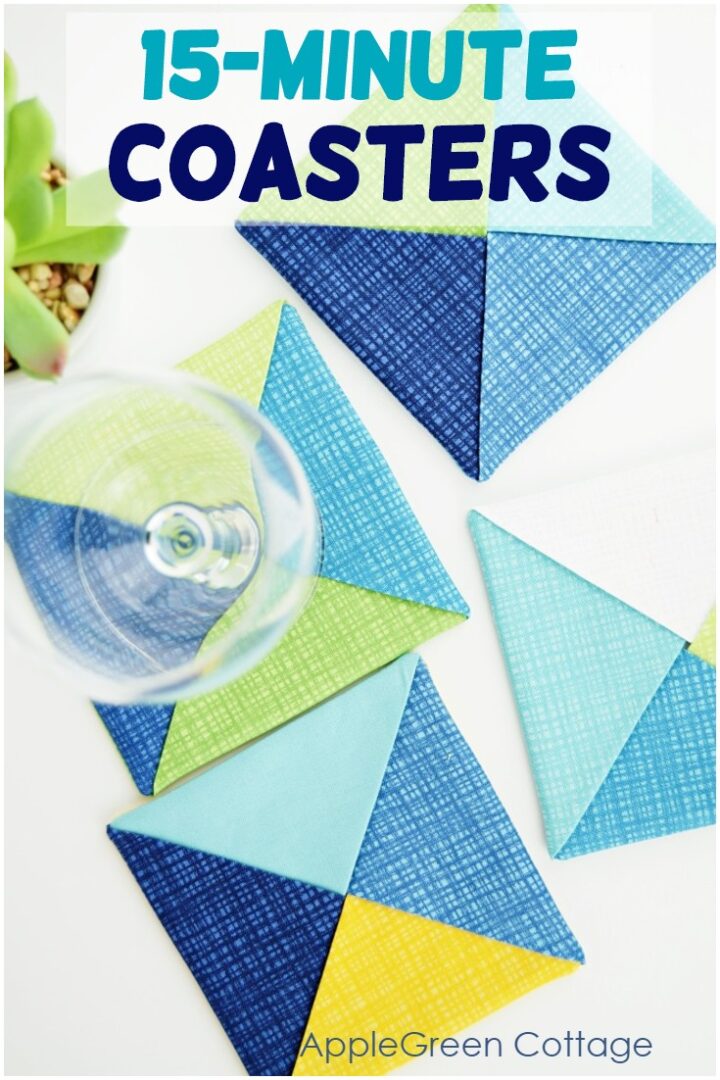
A coaster like this one should take you no more than 15 minutes to make - including the cutting of fabric. Even Less if you make them in batches!

So, are you in?
Diy Coasters tutorial
These diy coasters are such a fun thing to make for a present!
Supplies to make diy coasters
This is what you need to sew a single coaster:
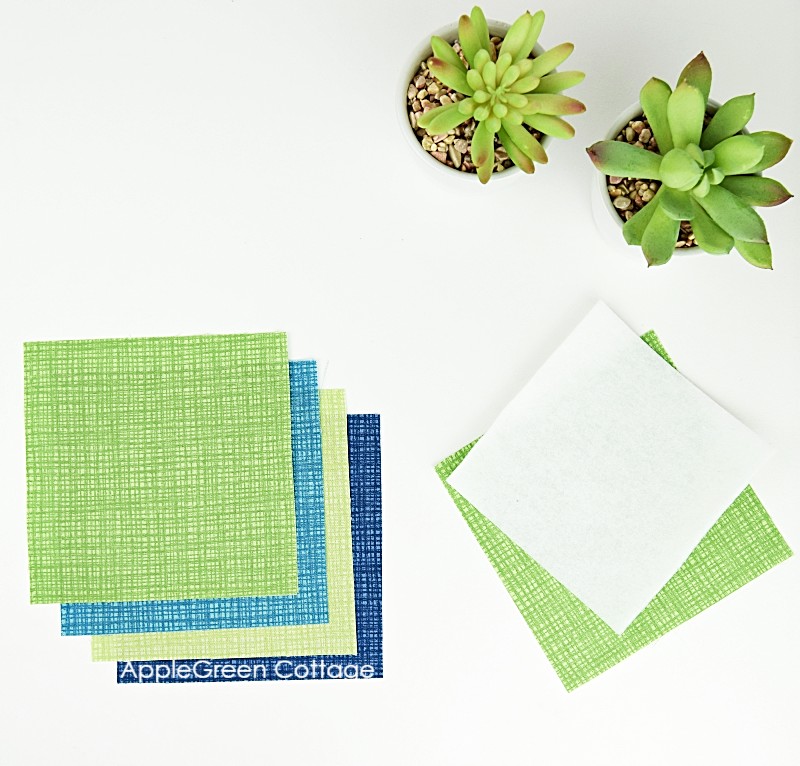
- 5 pieces of 5" squares from quilting cotton, in matching prints and colors
- 1 piece of 4 ½ " fusible fleece
You can use scraps from your stash or use the project as an excuse to go fabric shopping. But first, decide on your color scheme - I chose to make them in the prettiest blue and green colors, using the new Texture basics from Riley Blake Designs.
Here, I took a photo for you - but in real life, these are even prettier!

Steps To Make Your Coasters
Step 1 - Cut the squares
Cut the five fabric squares, and one slightly smaller piece from fusible fleece. If you use batting, keep it the same size as the fabric pieces.
Step 2 - Add Fusible Fleece
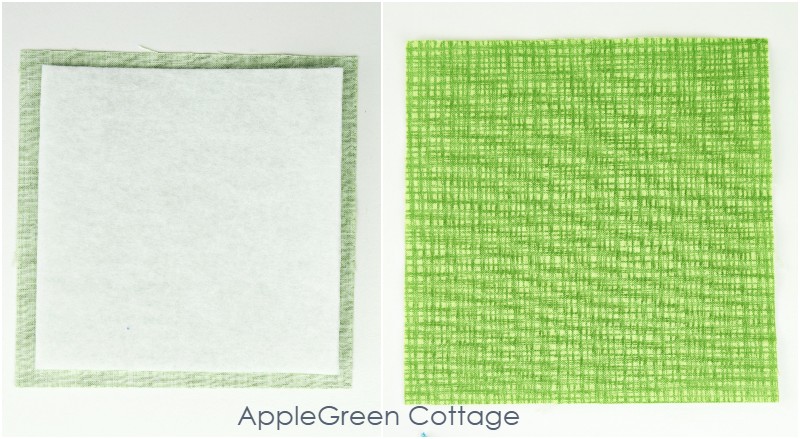
Fuse a piece of fusible fleece onto one of the pieces. It will become the back of the coaster.
Step 3 - Folding
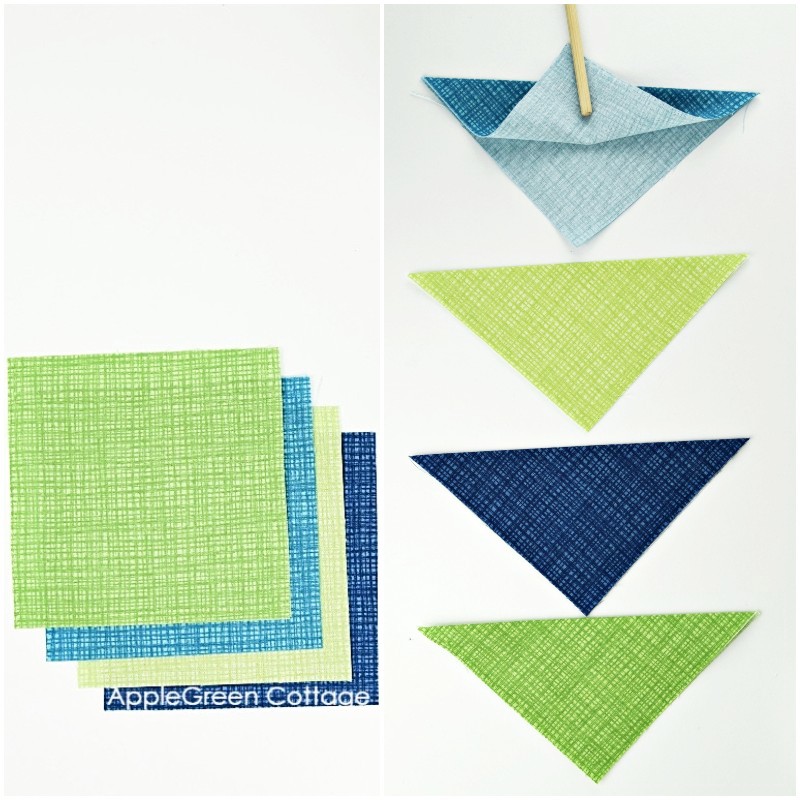
Fold all remaining four pieces diagonally with wrong sides together, so you get triangles. Press well.
Step 4 - Stack The triangles on the base square
With your bottom square right side up, layer the triangles onto the square covering it. See the image below.
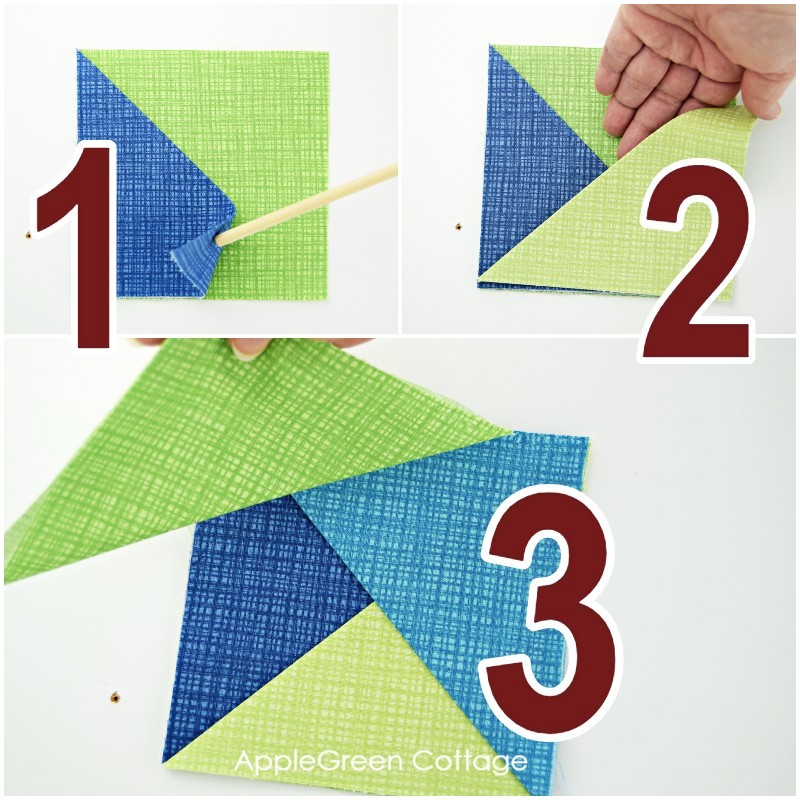
Bonus Tip: Go Counter-Clockwise!
It does not really matter in which direction you go when stacking them - clockwise or counterclockwise. But if you go counter-clockwise, it will be later EASIER TO SEW.
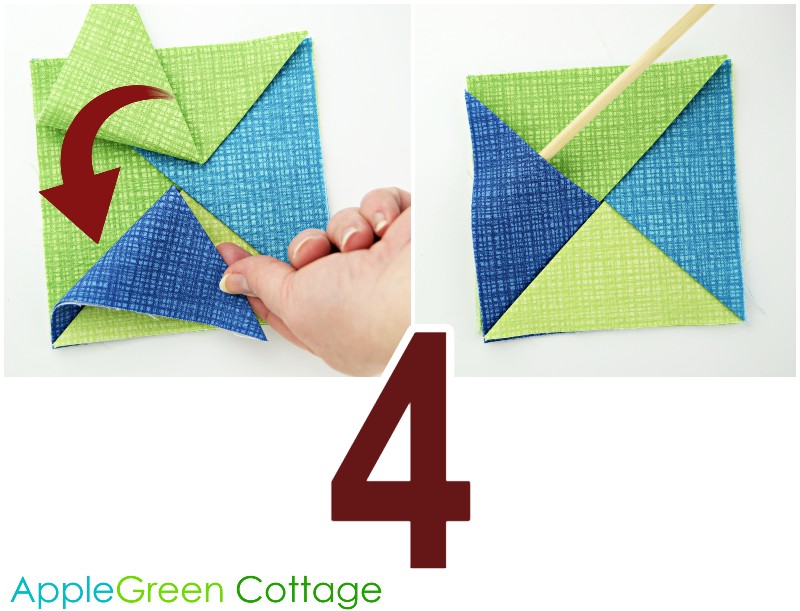
When placing down the fourth rectangle (see #4 on the image above), lift the first piece (here dark blue) and tuck the last one under the first piece – they will overlap, just like the rest of the folded pieces.
Step 5 - STitch Around
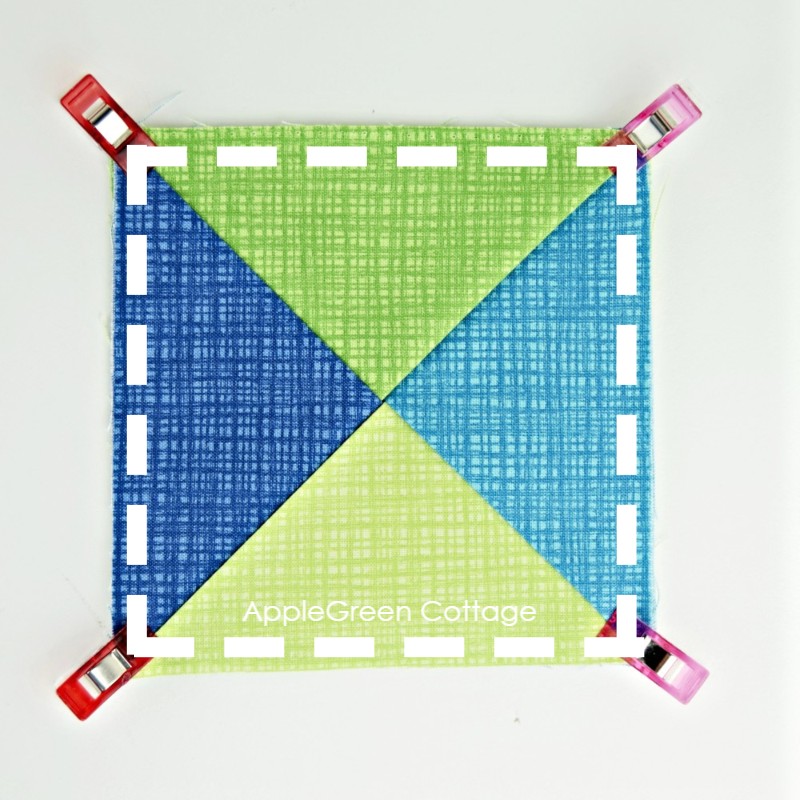
Clip or pin all the pieces in place, then sew along all four edges using a ¼″ (7 mm) seam allowance. NO need to leave a gap for turning!
step 6 - Trim
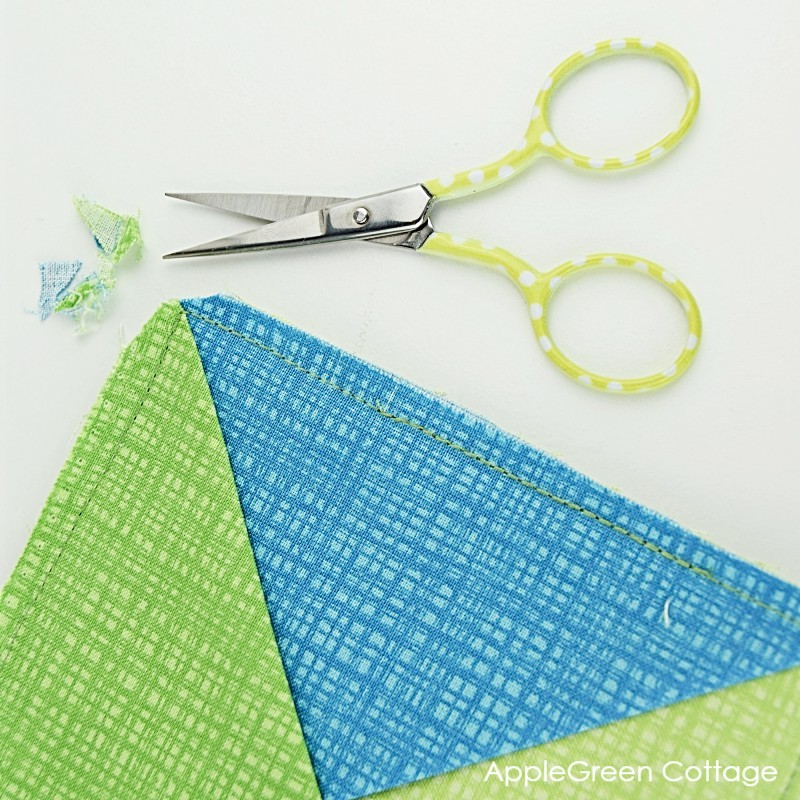
Trim the corners for easier turning, taking care not to clip into the seam.
Step 7 - Turn Right-Side out
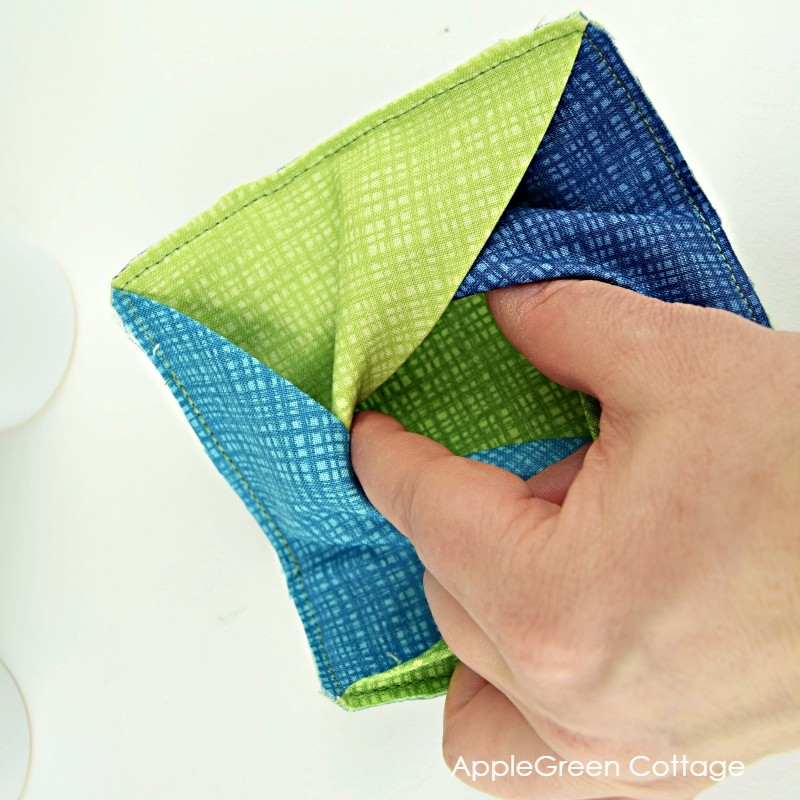
Turn the coaster right side out, reaching into the center between the rectangles. Press and done!
Now cut, sew, and repeat a few times. You'll end up with a beautiful set of diy coasters to keep or gift to someone special in your life.

Love color mixing and matching? Check out these colorful projects:
- The Sweetest Diy Pincushion - Two Tutorials in One!
- Trinket Tray And Pencil Holder - Free Pattern
- The Easiest Diy Placemat To Sew
- and 50+ beginner sewing projects - a HUGE list of my best ideas!
Also, feel free to save this easy crafty project for later if you don't have time to do it now - here:

Source: https://www.applegreencottage.com/diy-coasters/
Post a Comment for "How to Make Sewed Cute and Easy Coasters"